01 Jul A Step-By-Step Guide to Phlebotomy Procedure
Drawing blood is an important job in healthcare that needs careful and accurate work. This step-by-step guide to the phlebotomy procedure will help you learn how to draw blood safely and well. Mastering this skill helps take care of patients and is important for different medical treatments.
What Is Phlebotomy?
Phlebotomy is the process of drawing blood from a patient’s vein to check their health, monitor their blood levels, or collect blood for giving to others. Nurses, medical lab scientists, phlebotomists, and other healthcare workers often do this job. Collecting blood correctly is vital to ensure the test results are reliable. These results help doctors diagnose and treat health problems.
Professional Development and Certification
Learning and training will improve your phlebotomy skills. Learning more about phlebotomy and keeping up with new methods and safety tips to give the best care is very important. Going to workshops and seminars lets you practice and learn new things about drawing blood. More advanced training can give you deeper knowledge and make you better at this job. Think about joining programs that give you a certificate and count towards your continuing education. Many groups offer these programs, such as the American Society for Clinical Pathology (ASCP) and the National Phlebotomy Association (NPA).
Having a certificate shows that you are committed to excellence in your work. Stay informed by reading professional magazines and attending conferences about phlebotomy and related areas. Additionally, joining groups and networking with other professionals can give you support and new opportunities to grow in your career.
Preparing for the Phlebotomy Procedure
1. Gather Your Supplies
Before starting the phlebotomy procedure, ensure you have all your supplies ready. Here’s what you’ll need:
- Evacuated Collection Tubes: These tubes collect blood and have different additives for various tests.
- Personal Protective Equipment (PPE): Gloves, masks, and gowns protect everyone from infection.
- Needles and Syringes: You might need different sizes depending on the patient’s vein size and the amount of blood needed.
- Tourniquets: These are used to slow down blood flow and make the veins stand out more.
- Hand Sanitizer: Keeps your hands clean before and after the procedure.
- Alcohol Swabs: Cleans the spot where you’ll insert the needle to stop infections.
- Laboratory Specimen Labels: Make sure each blood sample is correctly labeled.
- Gauze: Used to press on the spot where the needle was after you take it out.
- Blood Transfer Devices: These help move the blood from the syringes to the collection tubes.
- Tape or Adhesive Bandages: Helps hold the gauze in place over the spot where you drew blood.
- Laboratory Forms: These forms list the tests you need to do.
- Bio-Hazard Leak-Proof Transportation Bags: These are for safely moving blood samples to the lab.
- Puncture-Resistant Sharps Containers: A safe place to throw away needles and other sharp things.
Having everything ready ahead of time helps avoid delays and makes the patient more comfortable. Always double-check your supplies before you begin to ensure smooth operation.
2. Verify Patient Information
It’s very important to ensure you have the right patient before starting. Always use two ways to check who they are, like their name and birthday. This step makes sure you’re working with the correct person for the tests they need. Checking this carefully stops any mix-ups and keeps the patient safe. It also makes sure the test results are accurate.
3. Explain the Procedure
Before you start, tell the patient what will happen during the blood draw. Explain why it’s needed and what steps you’ll follow. This helps the patient understand better and might make them less worried. Answer any questions they have. Patients who know what to expect might feel more comfortable and work better with you during the procedure. This can help lower their stress or fear.
Performing the Phlebotomy Procedure
1. Position the Patient
Make sure the patient is seated or lying down comfortably with their arm extended and supported. The vein you choose should be easy to reach. This setup helps prevent the patient from fainting and makes the blood draw easier for the phlebotomist.
2. Apply the Tourniquet
Put a tourniquet around the upper arm, a few inches above where you’ll draw blood. It should be snug enough to slow blood flow but not so tight it hurts. Watch the time—don’t leave the tourniquet on for more than two minutes. Keeping it on too long could change the blood and affect test results.
3. Choose the Site
The best place to draw blood is usually the median cubital vein in the elbow crease. You can also use the cephalic or basilic veins. Avoid any area that looks swollen, scarred, or bruised. Choosing a good vein helps avoid problems and makes the draw go smoothly.
4. Clean the Site
Wipe the area with an alcohol pad for about 30 seconds and let it dry on its own. This step keeps germs away and prevents infections.
5. Clean Hands and Wear PPE
Wash your hands or use hand sanitizer. Always wear gloves and other protective gear to keep you and the patient safe.
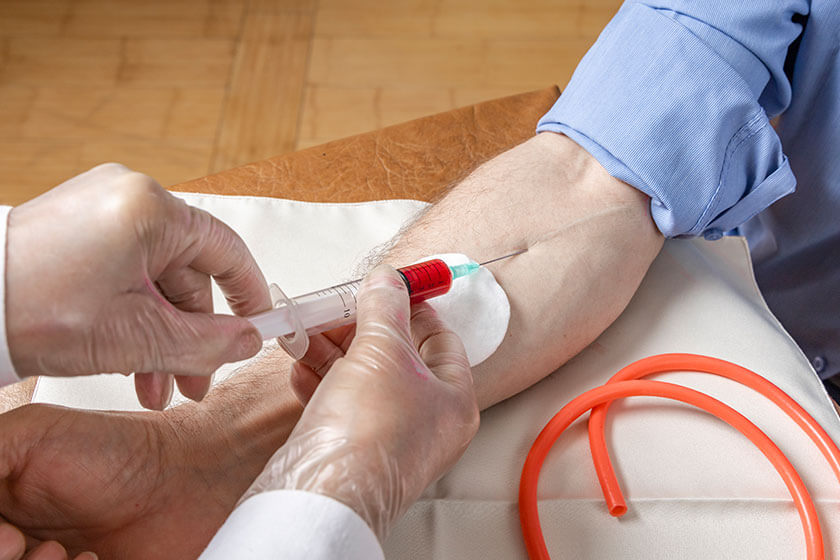
6. Anchor the Vein and Insert the Needle
Hold the vein steady below where you’ll insert the needle. Put the needle in at a slight angle. If done right, you’ll see blood enter the tube, which means you’re in the vein.
7. Collect the Blood Sample
Connect the tubes needed to gather the blood. Remember to use them in the right order to avoid mixing up the additives. Remove the tourniquet once you start filling the last tube. This helps ensure the blood test results are accurate.
8. Remove the Needle and Apply Pressure
Take out the needle smoothly and press down on the spot with gauze to stop any bleeding. Keep pressing until it stops. This helps prevent bruising and other issues.
9. Dispose of Used Materials
Throw away the needle and other used items in special containers for sharp objects and biohazards. Safe disposal helps avoid accidents and keeps the place clean.
10. Label the Samples
Mark each blood sample with the patient’s details and what tests are needed. Labeling right away helps make sure there are no mix-ups.
11. Deliver Samples to the Laboratory
Put the labeled samples in special bags and quickly get them to the lab. Quick delivery helps make sure the tests are accurate and reliable. Proper handling is key to keeping the samples good for testing.
Post-Procedure Care
After you remove the gauze, put a bandage on the spot where you drew blood. This keeps the area clean and helps protect it. Taking good care of the spot where the needle went in prevents infections and helps it heal faster. Tell the patient to keep the bandage on for at least 15 minutes and not to do any heavy activities with that arm for a few hours. Ask them to let you know if they notice anything unusual, like bleeding heavily or experiencing a lot of pain.
Telling patients what to do after the procedure helps them take care of themselves and know when they might need to see a doctor.
Essential Phlebotomy Tips
Getting better at drawing blood takes practice and always learning more. Here are some tips to improve your phlebotomy skills:
- Stay Calm and Confident: Patients can tell how you’re feeling. Being calm and confident can make them feel more relaxed.
- Use Proper Technique: How you insert the needle determines if you get blood. This includes how deep and at what angle.
- Be Ready for Tough Veins: Some people’s veins are hard to find. You might need to warm the area or adjust the patient.
- Talk to the Patient: Tell the patient what you do as you go. This helps them know what to expect and feel more at ease.
- Practice Good Hygiene: Always wash your hands and wear the right protective gear to stop infections.
Handling Complications
Even when you follow all the right steps, sometimes problems can happen during phlebotomy. It’s important to know how to deal with these issues.
Hematoma Formation
A hematoma occurs when blood collects under the skin because the needle went through a vein or because not enough pressure was applied after the needle was removed. If you see a hematoma forming, remove the needle immediately and press down hard on the area. Using an ice pack can also help keep the swelling down.
Fainting
Some people might faint during or after getting their blood drawn, especially if they are nervous or have fainted before. If someone feels like they might faint, have them lie down and lift their legs up. Make sure they are safe and keep an eye on their important body signs.
Nerve Injury
It’s rare, but sometimes a needle can hurt a nerve. This might feel like a sharp pain or a weird tingling. If this happens, stop the blood draw right away. Write down what happened and send the patient for more checks if necessary.
Infection
Getting an infection at the spot where the needle went in doesn’t happen often, but it can. Signs of an infection are redness, swelling, and pain. If a patient has these symptoms, they should go see a doctor.
Techniques for Finding Difficult Veins
Finding veins can be tough, especially in patients who are obese, dehydrated, or have used intravenous drugs before. Here are some tips on how to find and use hard-to-see veins:
1. Hydration
Ask the patient to drink water before you start. Being hydrated makes the veins bigger and easier to see and use. But, make sure it’s safe for the patient to drink water based on their health condition.
2. Use of Tourniquet
It’s important to use the tourniquet correctly. Put it on tight enough to slow the blood flow but not so tight that it hurts the patient. If you still can’t see the veins, ask the patient to make a fist or squeeze a ball to help the veins stand out more. You can also try lowering their arm below their heart for a bit.
3. Warming the Area
Putting a warm cloth on the area for a few minutes before you start can make the veins bigger and more visible. Ensure the cloth isn’t too hot to avoid burning the skin and keep everything clean and sterile.
4. Vein Finders
Vein finders are gadgets that use special light to see veins under the skin. They are really helpful for patients whose veins are hard to find. These devices can reduce how many times you need to poke the patient, making things more comfortable for them.
5. Alternative Sites
Best Practices for Pediatric Patients
Drawing blood from kids needs extra care because their veins are smaller, and they might be more scared. Distract them with toys or videos, or talk to them during the procedure. Let parents help comfort their child, but ensure they don’t get in the way of the process. Use smaller needles that fit the size of the child’s veins. You might also use a cream that numbs the skin to help lessen any pain.
Gentle Approach for Geriatric Patients
Older adults often have delicate veins and skin, so you must be very gentle. If it’s okay for their health, make sure they’re well-hydrated to help their veins show up better. Don’t use veins that look scarred or hard. Veins on the hands might be a better choice. Using smaller needles can help avoid hurting the veins. Since older people bruise easily, press gently but firmly on the spot after you remove the needle, and keep an eye on it to ensure a bruise doesn’t form.
Handling Patient Anxiety and Pain
Managing patient anxiety and pain is a crucial aspect of the phlebotomy procedure. Here are some strategies to help:
1. Communicate and Reassure: Talking clearly and calmly can really lower a patient’s anxiety. Tell them what you’re going to do, reassure them, and answer their questions. Being confident and caring really helps improve the patient’s experience.
2. Use Relaxation Techniques: Encourage patients to try deep breathing or other relaxation methods. This can help them stay calm and lessen anxiety. For those who are very nervous, you might play calming music or give them a stress ball to squeeze.
3. Use Topical Anesthetics: Putting a numbing cream on the area where you’ll draw blood can help reduce pain. This is especially good for kids or people who are really sensitive to pain. Make sure to use the cream as the instructions say.
4. Try Distraction Methods: Distracting the patient can help manage pain and anxiety. Talk to them, ask about their hobbies, or have them look at something interesting in the room. Playing with a toy or watching something on a tablet can work well for kids.
Phlebotomy for Patients with Disabilities
When drawing blood from patients with physical or mental disabilities, you need to be very careful and considerate. Use easy-to-understand language, pictures, or even a translator if needed. Make sure they know what’s going to happen and why. Adjust their position to make them comfortable, using special chairs or supports if necessary. If the patient needs extra help or reassurance, having someone else there to assist might be helpful.
Patients with Blood Disorders
Patients with conditions like hemophilia need to be handled very carefully to avoid too much bleeding. Use the smallest needle you can, press softly after drawing blood, and watch the site closely. Always check with the patient’s doctor for any special instructions.
Extra Precautions for Immunocompromised Patients
Following all the rules to avoid infections is critical for patients with weakened immune systems. Use clean tools, wash your hands well, and keep everything germ-free. These patients are more likely to get infections, so being extra careful is important.
Record Keeping and Documentation
Keeping accurate records is crucial in phlebotomy. Here are the main things you need to write down:
Patient Information
Write down the patient’s full name, date of birth, medical record number, and any other details that identify them. Make sure this info matches what’s on the blood sample labels to avoid mistakes.
Procedure Details
Note the date and time of the blood draw, who did the phlebotomy, and what tests are being done. Write down any problems that happened, like trouble finding a vein or how the patient reacted.
Sample Information
List the number of tubes you filled and what kind of tubes they were. Remember the order in which you drew the samples. Write down if any samples need special care like being kept cold or being sent quickly to the lab.
Patient Reactions
If the patient had any bad reactions like fainting, getting a bruise where the needle went in, or saying it hurt, make sure to record that. This info helps take care of the patient later and is good to know for next time.
Advanced Phlebotomy Techniques
There are certain advanced phlebotomy procedures that may require extra training. They require extra care and skills. Some examples are:
- Arterial Blood Gas Collection: This test checks the levels of gases in the blood and requires extra training.
- Therapeutic Phlebotomy: This is drawing blood to treat conditions like too much iron in the blood or too thick blood.
- Blood Cultures: This test looks for bacteria or fungi in the blood. You must be very clean to prevent the spread of germs.
Phlebotomy in the Laboratory Setting
Phlebotomists are vital in the lab because they ensure blood samples are taken, labeled, and sent off correctly. Their work affects lab results’ accuracy, and the care patients receive.
Laboratory Safety
It’s very important to follow safety rules in the lab to prevent accidents and keep a safe work environment. This includes wearing the right protective gear, safely handling and throwing away sharps like needles, and sticking to infection control practices.
Quality Control
To maintain the quality of phlebotomy, it’s crucial to use standard methods, check that equipment is working properly, and keep up with training and skill checks. These steps help ensure that lab results are accurate and reliable.
Patient Education and Aftercare
1. Providing Instructions
After drawing blood, tell the patient how to take care of the spot where the needle went in. They might need to keep the bandage on for a while, avoid lifting heavy things with that arm, and watch for signs of infection.
2. Addressing Concerns
Let patients know they should talk to their doctor if they experience ongoing bleeding, swelling, or severe pain. Giving them someone to contact with questions later can improve their care and happiness.
3. Educating Patients
Teach patients why the blood draw is important for their health and diagnosis. Knowing why helps lessen their worry and makes them more likely to follow through with needed tests later.
Conclusion
In conclusion, anyone involved in drawing blood must master the phlebotomy procedure. Every step, from getting ready for the draw to dealing with problems and learning more, is important for giving great care. Sticking to the best methods and learning new techniques ensures that blood draws go well and improve patient results.
If you’re interested in getting better at phlebotomy, think about joining our detailed training programs at Phlebotomy Training Specialists. We provide practical training and expert advice to help you succeed in your phlebotomy career. Check out our website to learn more and start on the path to becoming a skilled phlebotomist.